Keeping it Simple in Winter
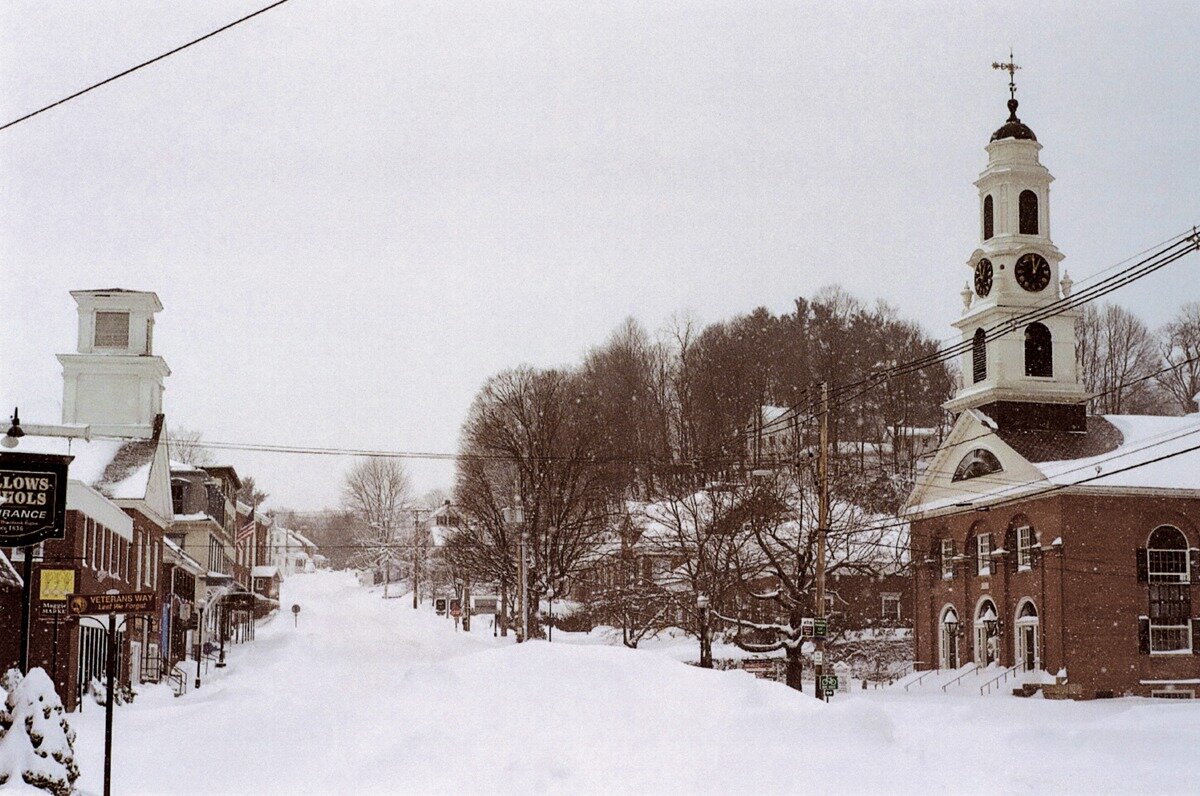
It's about time to talk about making pictures in snow and cold. This photograph shows the main street of the bustling small New Hampshire town of Peterborough, with about 6,000 residents. It was made just at the end of a two-foot February snowstorm. Not much bustle! Not a person to be seen the entire length of the main street, and no traffic either. It was quite cold (for this region, anyway), with a little snow still in the air, and no day to be slipping and sliding around carrying a large and heavy bag full of cold camera equipment – and having to open it for lens changes or anything else with cold fingers in gloves. So that day I used a simpler method.
Cameras in the Cold?
There are basically two ways of working in the cold: either keep the camera(s) and equipment bag out in the cold the whole time and avoid any heat which would immediately fog the lenses; or keep the cameras under a jacket and use them only for short periods, returning them under the jacket after a shot is made. On a day like this I like to use a “keep-it-simple” version of the second method, consisting of a single camera with a small lens on a neck strap under my parka, and perhaps one other lens in an interior pocket, making it possible to walk around almost entirely unencumbered. My chosen camera for this sort of thing is an M6 for compactness under the jacket. A reflect camera would do almost as well, but its larger size makes it more difficult to fit into the zipped-up jacket, and, since rangefinder focus is so much quicker and easier with wide angle lenses at large apertures in the snow, the M camera wins this round.
Carrying the camera and maybe an extra lens inside the coat keeps them at a semi-cold temperature with no worries about lenses or finders misting up when taking them out for a picture and quickly putting them back afterwards. And the camera's metering batteries and shutter are in no danger of freezing up either. The M6 has viewfinder frames for several of the lenses I might want, so supplementary finders are only occasionally needed. I just pull the camera out, shoot, and put it back.
In this case the duty lens was a 35mm f/2 Summicron-M ASPH with hood and UVa filter against the falling show, with a similarly equipped 90mm f/2 Summicron-M in an interior pocket. Film was Kodacolor Gold 200. The 35/90 outfit did everything asked of it during a period of slogging around in the snow, working handheld in the relatively poor light, and this shot has been well received on my photo cards and elsewhere – selling largely to summer visitors, I might add.
Other lens combinations that have worked well this way have been 28 and 50, or else a 21 and 35 combination which of course needs a 21 brightline finder. The 21 gets used quite a lot in snow, but here it would have made this little main street look too much like an Interstate! The 35 is usually carried as my “normal” when not knowing what to expect, since it shows things pretty much as the eye sees them. But if I want to present a subject in a very different way I'll have to go wider or longer, so I try to have one or the other as a second lens available under the jacket.
Exposures in Snow?
Exposure metering can be a problem in the snow. The meter wants to make anything it reads a medium tone, so with averaging or even center-weighted metering it reproduces the snow in a scene as very accurate gray. In order to make the snow white we need to expose for a medium-toned surface or object by taking a spot reading of a parka or sled or something with the approximate 18% reflection of a neutral gray card. Or as a substitute we could take a spot reading of lights and darks together like the trees-plus-snow mix seen in the middle of this picture. Or, finally, if there isn't any medium tone available, take a reading off the snow itself and add 1.5 stops in dull light as seen here, or add 2.5 spots on sunlit snow. This can be done by either opening the lens diaphragm or lowering the shutter speed to admit more light, thus making the snow look white. This method works well with color negative or b&w film with their large exposure latitude which helps to cancel small errors. But for contrasty slide film or digital capture, both having much more limited latitude toward overexposure, use one of the reading methods above and then bracket the exposure a half stop either way. Of course digital bracketed exposures can be chimped, or if there's time, check the digital exposure histograms on the rear screen to make sure one of them is right.
So, for expeditions on foot in the snow, it can sometimes pay to keep things as simple as possible, and be able to get the wanted shots without any extra weight and complexity added to the cold.

